Merge PDF and Images: Combine JPG, PNG, Scans, and PDF Pages Into One Clean File
To merge PDF and images, use a tool that accepts both file types, upload the existing PDF together with your JPG, PNG, or scan files, arrange them in the right order, and export one final PDF.
If every input is an image, Images to PDF may be enough, but when you already have a PDF and want to insert image pages before, after, or between sections, Merge PDF is the better workflow.
Most people searching this phrase are not trying to do something clever with file formats. They are trying to finish a real packet: a reimbursement form with receipt photos, a report with screenshots, an application PDF with ID scans, or a property summary with room images. The goal is not just to combine files. The goal is to hand over one document that reads clearly from page one instead of forcing the next person to open five separate attachments.
Fastest dependable path: keep the original PDF as your base file, add the image pages in the order you want, merge once, then compress only if the finished document is still too large.
Need the short version? Jump to Quick start: merge PDF and images in about 4 minutes.
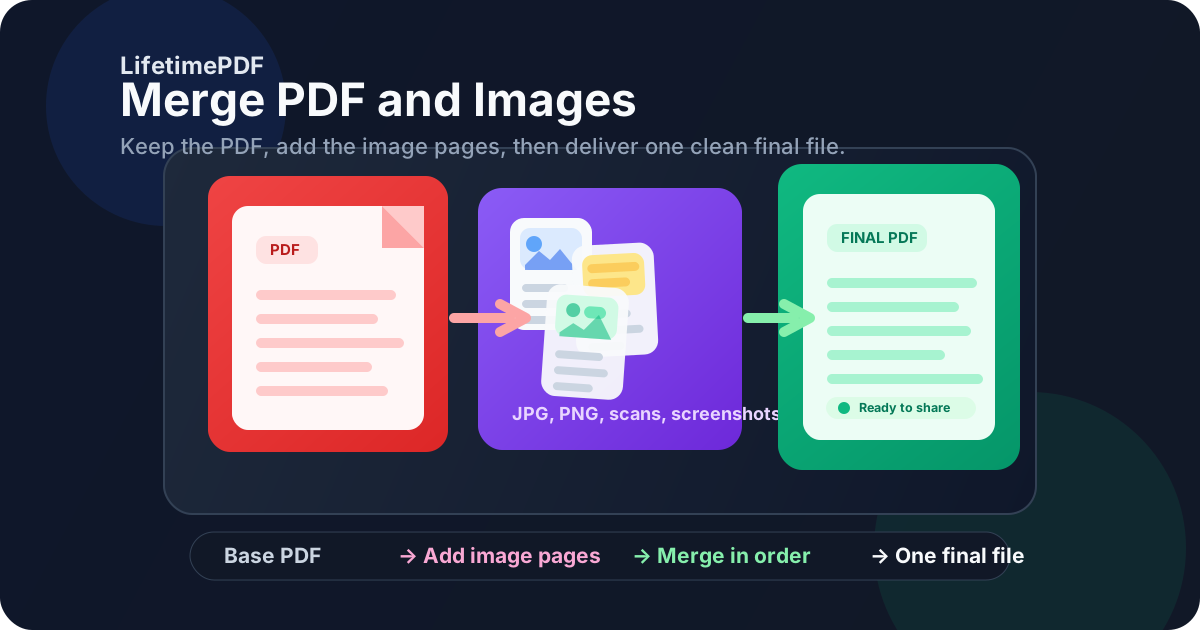
Table of contents
- Quick start: merge PDF and images in about 4 minutes
- When this workflow is better than plain Images to PDF
- Step-by-step: combine PDF pages with JPG, PNG, and scans
- How to keep image pages clean and readable
- How to order mixed-file packets so they make sense
- Common real-world use cases
- Troubleshooting file size, sideways photos, and messy scans
- Related LifetimePDF tools and companion guides
- FAQ (People Also Ask)
Quick start: merge PDF and images in about 4 minutes
If the files are already ready to go, this is the workflow most people actually need:
- Open Merge PDF.
- Upload the existing PDF together with the JPG, PNG, WEBP, GIF, BMP, HEIC, or scanned image files you want to include.
- Drag everything into the exact order you want the reader to see.
- Merge the files and download the finished PDF.
- If the final document is too large for email or a portal upload, use Compress PDF.
When this workflow is better than plain Images to PDF
A lot of people end up on the wrong tool because the phrases sound similar. Images to PDF is perfect when the whole job starts as photos or screenshots. Merge PDF and images is different. It is the better fit when you already have one or more finished PDF pages and you need to insert supporting visuals into the same document.
| If your files look like this... | The better workflow is usually... | Why |
|---|---|---|
| Only JPG, PNG, or phone photos | Images to PDF | You are building an image-only PDF from scratch. |
| An existing PDF plus receipt photos or scans | Merge PDF | You need to preserve the original PDF pages and insert images where they belong. |
| A PDF plus screenshots, charts, or exported images | Merge PDF | The image pages act as evidence or appendix pages inside a broader packet. |
| Mixed document packet with PDFs, images, and maybe Office files | Merge PDF | You are assembling one final handoff, not just converting pictures. |
That distinction matters because it changes how you think about the job. With image-only conversion, you are creating a document. With a mixed-file merge, you are organizing an existing document packet so it reads naturally.
Step-by-step: combine PDF pages with JPG, PNG, and scans
The workflow is simple, but doing the steps in the right order makes the finished document look much more deliberate.
1) Start with the PDF that should anchor the packet
That might be a form, a report, a proposal, a reimbursement sheet, a statement, or an application. Decide which PDF is the main document before you add anything else. If the packet has a clear base file, the rest of the ordering decisions get easier.
2) Gather only the images that actually belong
Remove duplicates, blurry throwaway shots, accidental screenshots, and extra camera images that nobody needs to see. Many mixed-file PDFs feel messy simply because too many source images were left in the pile.
3) Upload everything to Merge PDF
Open Merge PDF and upload the PDF together with the images. A good mixed-file workflow treats each image as a page that can sit before, after, or between your existing PDF pages.
4) Put the files into final reading order
This is the step that makes the output feel organized instead of improvised. If a receipt photo supports page 3 of a form, place it right after the relevant form page section. If a screenshot belongs in an appendix, push it toward the back where it supports the main document instead of interrupting it.
5) Merge once and review once
Download the final PDF and check it like a recipient would. Do the pages open in the right order? Are the images upright? Are screenshots readable at normal zoom? Does the packet still feel like one document rather than a stack of unrelated files?
Calmest sequence: choose the base PDF, trim the image list, arrange the reading order, merge once, and compress only if the actual final file still needs it.
How to keep image pages clean and readable
A merge step can organize the packet, but it cannot rescue weak source images by magic. If you want the final PDF to look credible, the image pages need a little care.
Use readable source images
Blurry phone photos, tiny screenshots, and badly cropped scans usually stay blurry, tiny, and badly cropped in the final PDF. If the source is unreadable before the merge, the merged file will simply preserve that problem.
Fix rotation before or after the merge
Sideways receipts and upside-down scans instantly make a packet feel sloppy. Rotate the image on your device before upload, or use Rotate PDF if the issue shows up in the merged result.
Do not overcompress too early
Many people shrink the images first, then wonder why the final PDF looks fuzzy. Usually the better move is to merge first and compress the finished PDF afterward if the completed packet is still too heavy.
Crop distracting borders and camera clutter
Huge table edges, desk backgrounds, fingers in the corner, or giant white margins steal space from the content that matters. Clean scans and tight screenshots make the final document feel much more intentional.
| If the image problem is... | The better fix is usually... |
|---|---|
| Text is too tiny | Use a clearer source image or retake the photo closer to the document instead of relying on zoom later. |
| The page is sideways | Rotate it before merging or correct the final PDF with Rotate PDF. |
| The final file is too large | Merge first, then use Compress PDF on the finished packet. |
| The scan looks messy | Retake or clean the source image so the merged PDF inherits a better page. |
How to order mixed-file packets so they make sense
A good mixed-file PDF is not just technically combined. It is sequenced well. The right order helps the next person understand the packet without manual reconstruction.
| If you are sending... | A strong page order is usually... |
|---|---|
| Expense or reimbursement packet | Form first, then receipt photos in the same order the form references them |
| Report with screenshots | Main report first, then screenshots placed where they support the relevant section or moved into a short appendix |
| Application or admin submission | Main application PDF first, then ID scans, supporting images, and proof pages after it |
| Property or inspection packet | Summary PDF first, then room photos or issue photos in a logical walkthrough order |
A useful default is to lead with the page the reader actually needs first, not the page that happened to be easiest to export. Main forms, summaries, or reports usually deserve page one. Supporting image pages should make the packet stronger, not derail it.
Common real-world use cases
This keyword exists because mixed PDF-plus-image packets are ordinary work. Here are the situations where it shows up most often.
Receipts and reimbursements
You already have a PDF form, but the supporting receipts live in your camera roll. One merged PDF is easier to upload, track, and approve than several loose image attachments.
Reports with evidence screenshots
Audit notes, SEO reviews, support investigations, and product reports often need screenshots behind the main PDF narrative so the evidence sits in the same file.
Applications and compliance packets
A portal may ask for one PDF only, even when your supporting proof exists as phone photos or scanned images. Merging everything into one packet makes submission much cleaner.
Inspections, property, and field work
A summary PDF plus room photos, site photos, or issue snapshots becomes much easier to review when it arrives as one organized document instead of a zipless pile of images.
In each case, the value is not just convenience. It is clarity. One well-ordered PDF reduces confusion, missed pages, and back-and-forth questions.
Need to package proof with the main document? Keep the PDF intact, add the image pages where they belong, and send one calm final file.
Troubleshooting file size, sideways photos, and messy scans
The merged PDF is too large
Merge first, then use Compress PDF on the final packet. That gives you a size fix based on the actual document you plan to send instead of a guess about which source file should shrink first.
The image pages are sideways
This is common with phone photos. If you catch it before the merge, rotate the images on the device. If you notice it afterward, use Rotate PDF on the finished file.
The screenshots feel unreadable
That usually means the source capture was too small or too dense. Retake the screenshot at a more readable scale, or split one overloaded image into two cleaner pages. A merged PDF should reduce friction, not force the reader to zoom endlessly.
The packet feels out of order
Rebuild it based on how a recipient reads, not how the files were created. Main document first is often the safest answer. Supporting image pages should appear exactly where they help the story instead of clustering randomly at the end by habit.
Related LifetimePDF tools and companion guides
Mixed-file packets usually sit inside a slightly larger workflow. These are the most useful next tools and nearby guides:
- Merge PDF - combine the existing PDF with image pages in one final file.
- Images to PDF - better when every source file is an image.
- Compress PDF - shrink the finished packet for email or portal limits.
- Rotate PDF - fix sideways pages after the merge if needed.
- PDF Protect - add a password when the merged packet contains sensitive information.
For related reading around the same topic, these guides fit naturally next: Merge PDF and Images Online, Merge PDF and Images Without Monthly Fees, Images to PDF, JPG to PDF, PNG to PDF, Compress PDF for Email, Merge PDF and Word Files, Merge PDF and Excel Files, and Merge PDF and PowerPoint Files.
Bottom line: the cleanest way to merge PDF and images is to keep the original PDF intact, insert the image pages where they belong, and optimize the finished packet only after the order feels right.
FAQ (People Also Ask)
How do I merge a PDF and images into one file?
Use a merge tool that accepts both PDFs and image files. Upload the existing PDF together with the JPG, PNG, or scan files, arrange them in the right order, merge them, and download one final PDF.
What is the difference between Merge PDF and Images to PDF?
Images to PDF is best when every source file is an image. Merge PDF is the better workflow when you already have a PDF and want to insert image pages before, after, or between sections.
Can I combine a PDF with JPG and PNG files in one output PDF?
Yes. A mixed-file merge tool can keep the original PDF pages, convert the JPG and PNG files into PDF pages, and package everything into one final PDF.
Will image quality drop when I merge PDF and images?
Usually the biggest quality factor is the source image. Clear screenshots, readable scans, and properly rotated photos produce the best result. If the final file is too large, compress after the merge instead of starting with weaker images.
What should I do if the final merged PDF is too large?
Merge first, then use Compress PDF on the finished document. That optimizes the actual file you plan to send instead of guessing too early.
Published by LifetimePDF - Pay once. Use forever.